Hello everyone! Jamie and I have been on vacation this week and it’s been really nice to have a break from the daily grind. It was our original intention to be in the Keys this week, but taking into consideration gas prices and the storm earlier this year we decided not to go. Jamie and I came to the conclusion we would rather put that money into the garden instead. We both agreed , although it would have been nice to spend time at a tropical resort, we could enjoy each others company just as well playing in the garden as we could lying on the beach at Key West. There is always next year. In case you hadn’t figured it out yet, Jamie and I are masters at finding bargains on plants. As a general rule we don’t buy anything unless it’s at leas 60% off and we prefer 75%. Due the recent treasure trove of 80 and 90% off deals we had found, the potted plants were building up so it was time to get them in the ground. We nurse them back to health, but they don’t really thrive until we plant them in their new homes. That being said, we decide to put in a new bed. I thought I would share the process we go thru when we create one. This is the latest of ten beds we have put in this year, this is one of the larger ones.
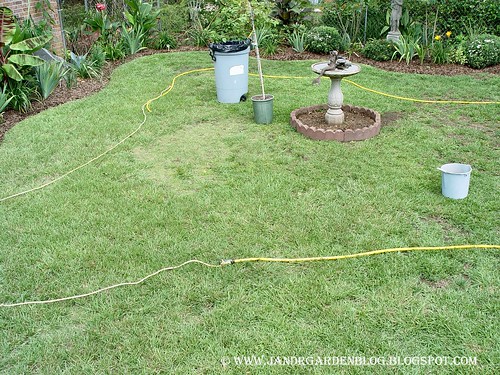
I drew up a diagram of our lot and from that decided where and how to place the beds. We start by laying out the shape on the ground with the garden hose. In this instance we had to extend it by tying a rope to the end of the hose. When we are satisfied with the shape of the new bed we take a can of white spray paint and draw out the lines on the lawn.
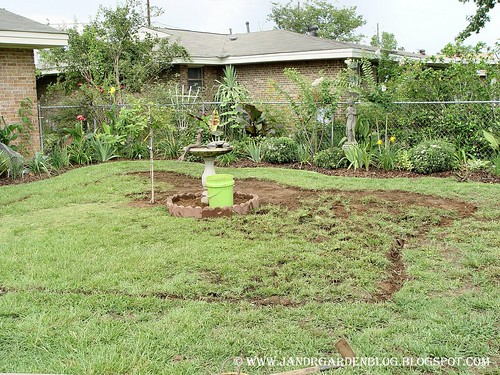
Next we cut out the shape of the bed and begin removing the grass. This is my least favorite part of the entire process. Jamie and I take shovels and slide them under the grass removing the sod and then we go back and shake all the dirt out of the grass and discard it. We have about four or five different types of grass in the back yard and a lot bare spots as well. This particular bed had several very large areas of gorgeous centipede grass. We were able to transplant it to most the bare areas in the lawn and so far it looks at if all of it is going to survive.

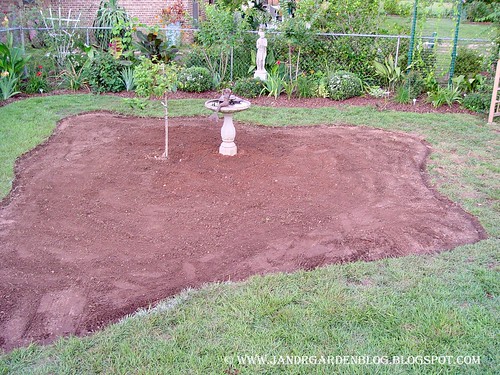
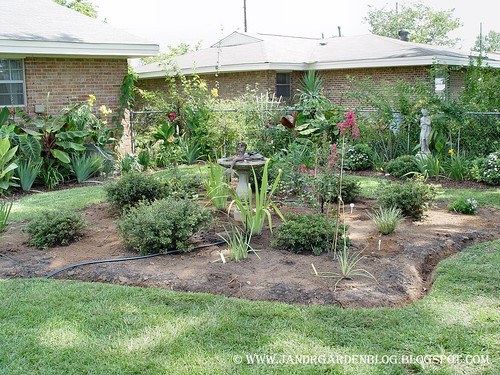
After all the grass is removed, we cut a trench around the perimeter of the bed about four to five inches wide and about five inches deep. Then we start the process of amending the soil with more top soil and composted manure. In this case we added eight hundred pounds of topsoil and four hundred pounds of composted manure. We don’t have a tiller, so we incorporate all this by turning the soil with shovels. Yes, it is a tremendous amount of work. Jamie and I both got a lot of blisters on our hands from this one. We just keep on going until we get done, then we spend the following day whining about how bad our hands hurt. We are both very determined gardeners.

Next we start placing all the plants around until I’m satisfied with where they will go. This is a time consuming process, because I’ll shuffle those things around in a hundred different arrangements until I’m satisfied with what we have. Then we finally plant them in the ground and put down the lines for the drip irrigation.
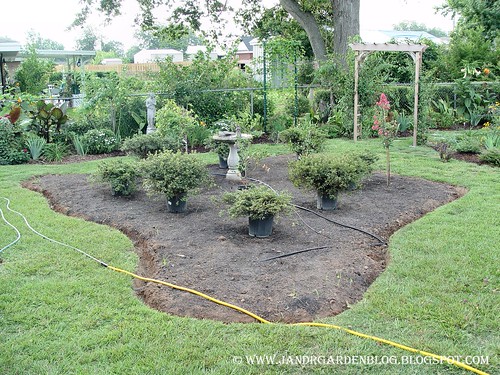
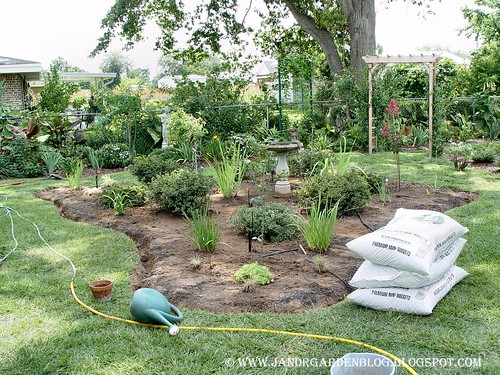
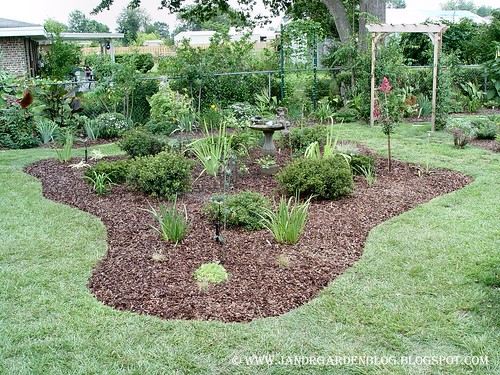
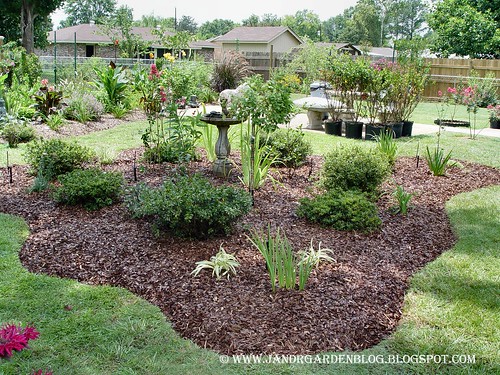
Once we are satisfied with the placement of the sprinkler heads, in goes the mulch. We spread out the mulch to cover the water lines and help hold in the moisture. We both like the way the small pine bark nuggets look, though it is frustrating because in times of extreme down pours of rain it tends to wash out of the bed some. After the mulch is spread, we sit back on the grass and admire out hard work.

18 comments:
This is one reason why I like your blog so much, you walk us thru the real stuff. I also make my gardens this way-all by hand and I transplant the grass elsewhere. It is most satisfying. Your garden looks super great-and you all make it look too easy!
Hey Randy, great post! I'm sure a lot of people will find this extremely helpful. I'm convinced that you and Jamie are the hardest working gardeners in the world!
Thanks so much for posting this process. Everything looks so nice, by the way. Good work!
Thank you Tina. It boosts our confidence when we get such great compliments. That Bermuda grass was a job to get out!
Thank you Phillip, but since your garden is ten times the size of ours and you manage to maintain it so well, I think we know who the real hard worker is here. You place is a piece of heaven on Earth.
Thank you Lacey, we are trying. We are by no means anyone to be giving out advice, but we are happy to share the way we do things here. :-)
I love the new bed you two created. I think having big beds and just a pathway of grass around them is so attractive. I would love to do something similar in my garden, but I don't have the stamina of you guys. I perfectly understand your decision not to go to the keys and spend the money on the garden instead - I'd do the same thing. You will enjoy the garden for many years, so it seems to me like a good investment.
Jan
Always Growing
Jan,
Would you believe we started on two more small beds yesterday? I'll post pictures of them when we are done. I keep wondering who's going to take care of all this stuff 20 years from now. :-)
Twenty years from now you will still be in great physical shape because of all the exercise you got from gardening when you were younger.
Jan
Always Growing
Wow that looks great!! With all that time spent preparing the bed it will fill in in no time. I guess you already know that. It is what I do when I make a new bed. All the hard work is worth the wonderful outcome!
I agree with Phillip--what you all get done in a relatively short period of time is amazing. I love the new bed--but I agree with you, taking up the grass is tough work (somehow, even digging up clay seems easier--I guess it's the difference between digging down and scraping across). Anyway, I hope you and Jamie toasted to your beautiful new bed after all that hard work.
Where did (or will?) you put the ligustrum?
You boys just wear me out! You have sooo much energy! Oh, and it looks great! But I see in the pic there are more potted plants in the background. So more planting?
Thank you Cliff! We try, since this post was made we've put in two more smaller beds. LOL
Cosmo,
The Waxleaf Ligustrum are coming back out nicely, but we have no where to put them now. I suppose we will give them away. Originally we wanted Variegated Chinese Privet to go where we were planning to put the Waxleafs. We found the Variegated ones so we went with them. We put them across the back fence where you can see all the houses, in a couple of years, those houses will be hidden by hedges. :-)
Wayne, I don't know that we have so much extra enery. LOL You don't see us at two and three PM when we are so tired we tripping over garden tools and our own feet. I actually fell backwards into a bed this weekend LOL. Yes, those are more pots in the background. We stopped at a HUGE nursery in Cresview, FL on our way home and added twenty more pots to the ones that were already there. LOL
So you can post on your privet hedge for Blogger Design Workshop! I don't know what I'm going to do--I don't really have any screens and my trellises and arches look pretty ragged right now . . .
Cosmo,
What's Blogger Design Workshop?
It's a monthly thing, like Bloom Day, managed by Gardening Gone Wild:
http://www.gardeninggonewild.com/?p=1405
Last month was "Whimsy," and I posted but then forgot to link back to the GGW site (rookie mistake--I expect I'll make a lot). There were some very cool postings, including a really beautiful one by Phillip at Dirt Therapy.
Hi Randy and Jamie, once again you knock me out with the amount of physical work you are able to do in the garden so quickly. And the end result already looks so good. I agree with Tina, seeing it step by step helps others learn how to do something right. Your entire garden is fabulous.
Frances,
I'm going to try and post more of our projects like I did this one. Hopefully I won't bore everyone to tears. :-)
Wow, what a gorgeous bed. I too like the small path of grass. Many more flowers to look at. You did a great job. Thanks so much for sharing.
Lola,
Thanks for stopping by our place! We try out best, some times we do something right. :-) Don't be a stranger-Randy
Post a Comment