Monday, August 24, 2009

The Four Seasons


Well, the girls are finally here. Jamie and I have wanted to add the four season statues to our garden for a long time, but were uncertain as to where we could put them. When we finally completed the new back bed Jamie suggested it would be a good place. After searching forever, we finally found a place we could get them. The unstained statues weren’t that hard to find, but finding the pedestals that came with them was a different story. After debating the existence of them with several companies I was finally able to convince a nursery in Montgomery to search. They found them and were willing to order them for us. They came in last Monday and Jamie and I went to the nursery to pick them up this past Saturday. In the photo below there is a 4th goddess waaaaaaaay down at the end that isn’t visible. There was just no way to capture all four in the same photo because although it may not look like it, this bed is 75 feet long.

R to L


The Horai were the four Greek goddesses of the seasons. In original mythology there were only two seasons, Thallo and Karpo or blooming and fruiting. Later the seasons became three goddesses to exclude winter. It wasn’t until the 4th or 5th century that all four seasons were represented by goddesses and given a name. Very little information is available on what is considered to be the 4th generation Horai that symbolize all seasons. They were mentioned in the epic tale ‘Dionysiaca’ produced by Nonnus in the 5th century and have been represented as 4 since that time.

The goddess of spring, Eiar, is usually found holding a bouquet or garland of flowers.

Spring


Theros, the goddess of summer, is usually holding a harvest of wheat. When purchasing the statues you may sometimes find fall and summer misidentified.

Summer


The goddess of fall, Autumnus, is found holding grapes or some other fruit.

Fall


Chiemon, the goddess of winter is usually found wearing a cloak or long sleeved garment and sometimes holding a flame.

Winter


This will most likely be the last statuary purchased for the garden. I think once the privet and other shrubs grow in to screen the distracting view of the houses the statues are going to look great. Not to mention the bed is practically void of any perennial planting. I had hoped to take care of that this year. For now, I’m really starting to feel a little gardened out, if we get the new plants in the bed this fall that’s great, if not there is always next spring. :-) I hope everyone has a great week!

L to R

Wednesday, August 19, 2009

Wordless Wednesday


DSC01462C


Everyone have a great day!

Monday, August 17, 2009

Westinghouse Solar Lights


Jamie and I have finally reached a point where we are ready to install landscape lighting in the garden. There are so many products for sale now it’s hard to know which ones to pick. In the past, solar lights haven’t been a very reliable source of luminance for the garden. Recently, leaps and bounds have been made in the available variety of products and I’ve been anxious to see what’s out there. When Teak Wicker & More contacted me and asked me to do a review on these landscape lights, I was happy to oblige and thank them for the opportunity. I intend to do a future post on landscape lighting and what I’ve learned, but this post is strictly for review of the product sent to me.

Within 24 hours of the shipment date I received the Westinghouse lights via FedEx. The first thing I noticed upon opening the box was that these were very chic lights with a nice modern design to them, but that they could easily fit into the design of any garden. Over 26 inches in height and 2 ½ inches diameter, the antique copper finish on these lights make them very attractive in the garden and I didn’t feel the need to conceal them from view.

DSC01640C


The thing I was most interested in was the output of light. With only a single diode as an illumination source, I knew that a tremendous amount of light was not going to be produced by these particular lights and I was correct in assuming so. I must admit though, I was extremely surprised at the amount of light that was produced by them.

If you are looking to light up a path or walkway these lights may be inefficient for those purposes, but you should also realize they were not designed for that task. The light source is simply too high from the ground. The most efficient lights for that job are lights that cast the light downward and not out, the way these were designed to function. Also keep in mind that these are solar lights and if you place them in a shaded area they will perform very poorly. They, as well as all other solar lights need sun to operate.

DSC01689C


If you are looking for a soft, ambient light to place in darker areas of your garden this light set is the way to go and should certainly be a consideration. They provide a very pleasant glow in a small circumference around them that I find very aesthetic and reminiscent of moonlight. If you are less interested in the artsy contribution and need lights for a more practical purpose you may want to consider going for a higher level of luminance.

Taking into consideration the design, size and light output of this set I find them fairly reasonably priced for a mail order item. In summary I was very pleased and my only regret is that we have six of them instead of twelve. These statements are of course only my opinion. You can find other reviews and order the product here.

Wednesday, August 12, 2009

Almost Wordless Wednesday


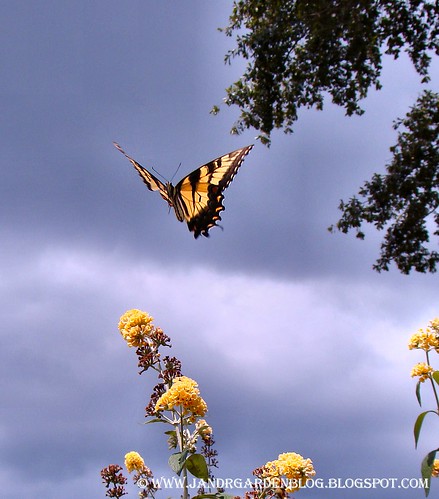
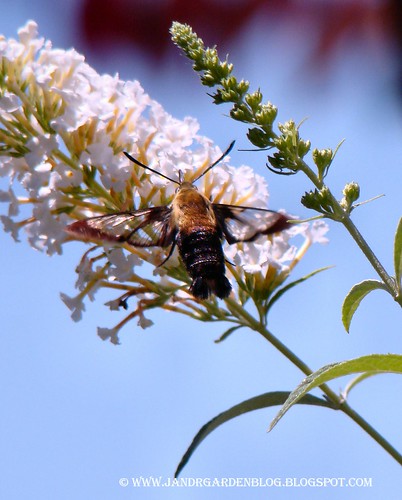
The butterflies finally found us this weekend and they've been everywhere. I don't ever remember having so many swallowtails in the garden at one time before.

DSC01561C


DSC01511C


DSC01484C


DSC01501C


DSC01591C

Friday, August 7, 2009

Installing Drip Irrigation


Jamie and I ran the third line for the drip irrigation system yesterday. It's so simple to do and can save you so much time watering I wanted to show you guys some pictures. This post is a little long. Everything you need to do this you can find at the drip irrigation system section in Lowes or Home Depot. Or, for beginners you may want to just buy the little kits with everything you need to run you drip system for about 35 or 40 dollars. The kit was too small for our purposes so we just bought everything individually. We have hundreds of feet of lines running in our yard. The system can be as complicated or as simple as you like. Ours even fills the bird bath and waters the hanging pots. If you go with the kit, you can always add on to it later as you get use to what you are doing. It’s cheaper to just buy what you need. Look at the pictures on the back of the box; it will help let you know what to do and what you need.

This first picture shows the line running from our faucet to the yard. Our faucet has one of those inexpensive attachments on it that changes it from one spigot to four. It came with a timer kit we bought made by Orbit. It’s an extremely efficient system at a very affordable price and I highly recommend it. It can be found online or in your local big box store. I don't understand why, but you can get the same kit I've linked to for much cheaper in the stores than you can from the actual site, the link is to show you what we are using. We actually just bought a second one from Wal- Mart for about 25 dollars less. It can be just a tad bit tricky learning to program it, but after you learn how it’s set up you’ll realize how simple it really is to operate.***For those of you that are wondering I have no affiliation with the company I just really think this is a fantastic product and Jamie and I are very pleased with it’s performance.***

DSC01433C

In this second photo you can see the half inch water line running into the bed and under the side walk. I had the foresight to think about running a section of line under the sidewalk when we put in these two beds. Then when we got ready to run the line all we had to do was to connect to it. It’s very simple to do. Just attach your water hose to a broom handle or pipe with some good tape, turn it on full force and keep pushing. Before you know it that water will wash away a small tunnel and you will be under the side walk in no time.

DSC01434C

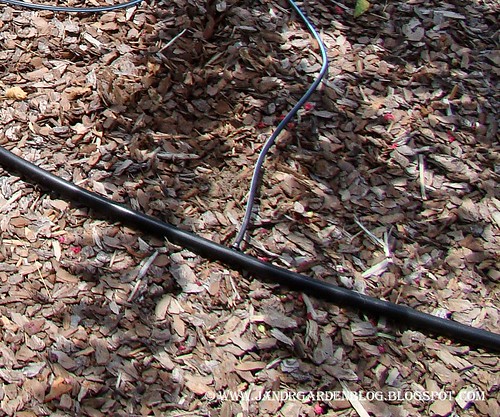
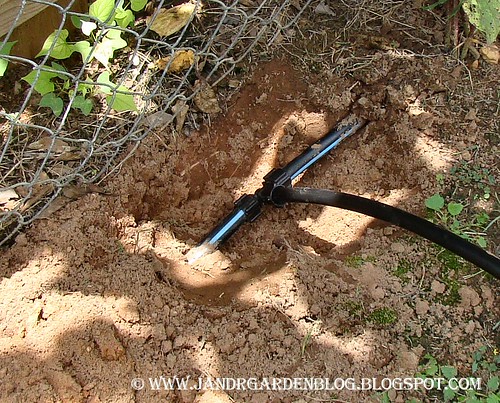
The quarter inch line that you use to run water to your drip emitters and sprinkler heads just snaps into the side of the line in a hole you make with a provided hole punch.

DSC01434CC

You just lay out your half inch tubing where ever you need water to go.

DSC01435C

DSC01436C

DSC01437C

All the connectors just simply slide into the pipe. This takes a little strength. They come in T’s and elbows and two sided to connect two sections of line.

DSC01437CC

DSC01438C

You can see the quarter inch line running to each plant here. It’s held in place by little plastic stakes that you can buy.

DSC01439C

All that’s left to do now is bury the line. It doesn’t have to be deep; all you do is stick your shovel in the ground and lean it forward and back to wiggle open a little slit in the ground. Just push your hose into the little slot in the ground and step on the grass to push it back down when you are done. It’s barely detectable that anything has been disturbed and after a week you can’t even tell you buried a line. You just want it covered so the lawn mower can’t cut it or to hide if from view. You can see in the picture it’s about an inch or two deep in our yard. In the beds, just cover it with mulch and use landscape cloth pins or pieces of old wire hangers to hold it in place. The reason this is so dug up here is because we were tying into another line that was already buried.

DSC01440C

For just a couple of hours effort, you can save yourself tons of hours standing in heat, dragging hoses. It’s the best thing we’ve ever done. If you need any help or need pictures of how to do something, just let me know. Jamie and I have become old pros at this.

Oh, one more thing you should know. The half inch line can only carry 244 gallons of water an hour. So if you are using sprinkler heads that put out 4 gallons per hour you can only use 61 heads, 10 gallon per hour – 24, drip emitters that put out 2 gph you can use 122. You can never put out more gallons per hour than the hose carries. Well you could, it just won’t work as well. It would be better to just run another half inch line to make another watering zone.

In other news Jamie and I have been researching the new lighting system we will be installing in the garden. It can be so confusing with so many types to choose from today. As luck would have it, I’ve been contacted by Teak, Wicker & More and I’m very excited to say they have asked me to do a review of a solar landscape lighting product for them, so look for the post to be coming soon. If you aren’t familiar with Teak, Wicker & More they have a very nice line of patio furniture and tons of other home and garden products.

Wednesday, August 5, 2009

"Down on Your Knees" Photo Contest.


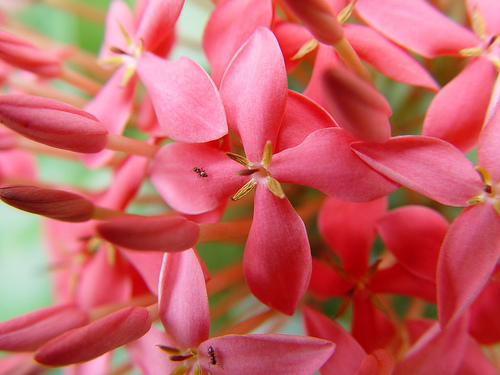
David Perry picked the subject for this months Gardening Gone Wild photo contest. The challenge is to present a photo taken from knee high or lower that shows different levels of existence that we would not normally see in this hurried world we live in today. So below is my photo submission. Good luck to all the participants. :-)

Pink_Ixora

Monday, August 3, 2009

In the Garden 08/03/09

Jamie and I had a very busy and productive weekend. We’ve needed to put in a third line to our drip irrigation system since last year; it was one of those things we just never got around to doing. Jamie and I laid out another 200 feet of line and we should really see some good growth on some of the things that were maybe not getting as much water as they should. I told Jamie one by one we are slowly completing the really large projects and within the next year or two our garden will just simply be a matter of maintenance. The next large project we tackle will most likely be the lights or the water feature, but that’s down the road and more than likely next season.

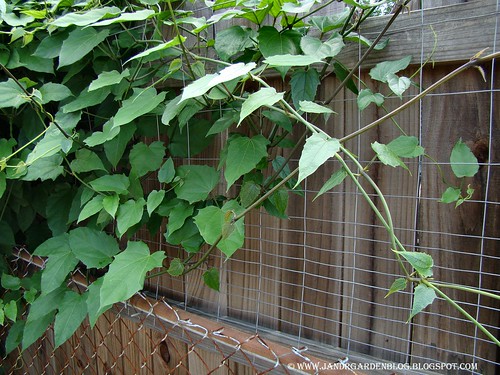
Why don’t we walk around a little and see what’s going on in the garden? The Thunbergia Grandiflora is looking good this year. It’s really covering this 20’ section of wall well and should be filled with blooms before very long. I hope it’s going to be breath taking.

Thunbergia


I think one of the reasons it’s spreading so well is because Jamie and I got permission from our neighbor to place this fencing on the back of her privacy fence. It gave something for the vine to hold on to and enabled us to fan it out nicely. Next year we will need to divide this plant more than likely.

Sky Vine Trellis


We have a couple of first blooms in our garden right now. ‘Zephirine Drouhin’ is giving us our very first bloom ever. It’s planted on a split rail fence in the front yard between 2 ‘Veilchenblau’ we thought the pink and purple would look good together when they bloom in the spring.

Zephirine Drouhin


One of our Banana trees is giving us our first bloom too. We have tiny little bananas about 1 inch long. Every time a new petal opens more bananas are exposed.

Banana Bloom


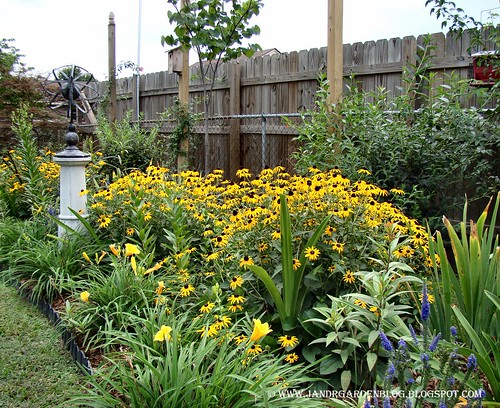
The Susans are looking good. We will be dividing these in the fall, they have hole in them that needs to be filled so we’ll just move them over a little.

Susans


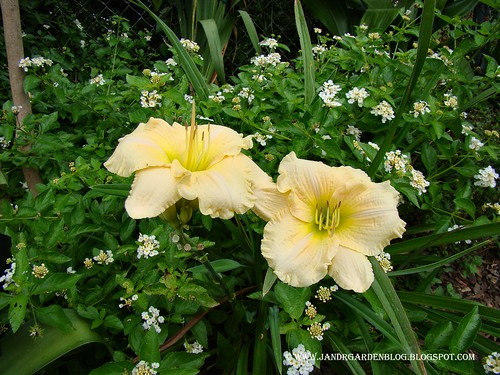
Jamie had decided he wanted black berry lilies in fall of last year. We’ve purchased two since that time. This one is ‘Hello Yellow’. I’ve fallen in love with these little flowers and I want to fill the new bed with them and Candy Lilies. If you happen to run across cultivars of these lilies feel free to email me the name of them so we know what to look for in catalogs and online.

Hello Yellow


‘Sound of Silence’ is rewarding us with blooms again.

Sound of Silence


All three of the Pee Gee hydrangea standards are filling with blooms. They’re going to need re-shaping after they bloom.

Pee Gee Bloom


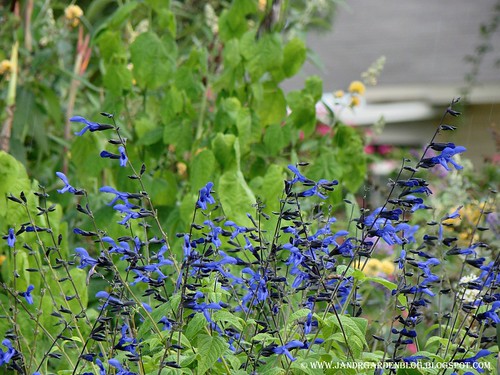
By far one of my favorites in the garden is this Black and Blue Salvia. The humming birds just absolutely love this plant. Last night swarms of little birds were fighting and fussing with each other over which one would drink its nectar.

BB Salvia


I think we’ve decided on the new shrubs to replace the mums this fall. I’ll be telling you more about that at a later date. Thanks for all you ideas and the plants we chose did come from your suggestions. Hope everyone has a good week and I’ll be visiting you soon.

Black and Blue Salvia